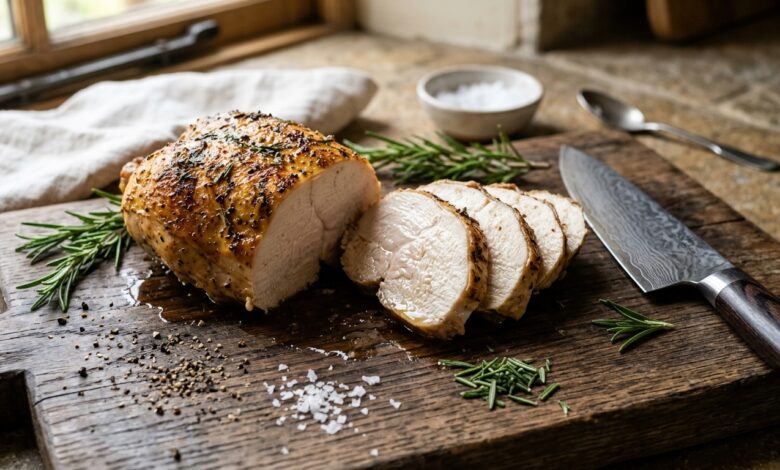
You pull a pan of sizzling chicken breasts from the oven or lift drumsticks from the grill. In addition, you do not have a digital probe thermometer in your kitchen drawer. Knowing how to verify that your chicken is cooked safely is essential to protect your family from foodborne bacteria while preventing meat from drying into a rubbery texture.
Undercooked poultry carries serious risks of Salmonella and Campylobacter contamination. While professional food safety bodies like the USDA recommend cooking poultry to an internal temperature of 74°C (165°F). Furthermore, experienced home cooks and chefs have verified doneness using sensory indicators for centuries. Specifically, in this practical culinary guide, we explore visual indicators, juice clarity tests, texture benchmarks. In addition, knife cuts to ensure your chicken is thoroughly cooked and succulent.
The Juice Clarity Test: The Most Reliable Visual Check
The single most dependable sensory method to determine whether poultry is safely done is inspecting its natural running juices:
Take a sharp paring knife or metal skewer and pierce into the thickest part of the meat (such as the center of a chicken breast or between the leg and thigh joint). Furthermore, gently press down on the surrounding meat with the flat of a fork and observe the liquid that beads out of the incision:
- Pink or Cloudy Reddish Juices: The internal meat has not reached pasteurization temperatures. Furthermore, hemoglobin proteins remain uncoagulated. Return the poultry to the pan or oven immediately.
- Crystal Clear, Shimmering Juices: When running juices run completely clear and transparent with zero pink tint. Furthermore, internal muscle proteins have fully set. Furthermore, your chicken has achieved safe doneness.
Visual Checks to Confirm That Chicken Is Cooked Safely
Raw poultry flesh displays a glossy, translucent pinkish tone. Furthermore, as heat penetrates internal muscle fibers, animal proteins denature and turn fully opaque.
Make a small incision into the thickest section of the cut. Furthermore, look closely at the center fibers. The interior meat should appear uniformly white (for breast meat) or light tan (for dark thigh meat). Specifically, if you detect even a subtle translucent jelly-like consistency, the cut requires further cooking time.
Note on Bone Marrow Pinkness: Occasionally. Furthermore, fully cooked chicken near the bone displays a reddish or purple coloration. In young broiler chickens, porous bones allow red marrow pigments to seep into adjacent meat during roasting. As long as the meat fibers are completely firm and the juices run clear. Furthermore, this purple staining is harmless.
Sensory Doneness Indicators: Raw vs Cooked Poultry
| Sensory Evaluation. | Undercooked Poultry. | Thoroughly Cooked Poultry. |
|---|---|---|
| Internal Juice Color. | Pink, cloudy, or reddish fluid. | Completely clear and transparent. |
| Muscle Fiber Texture. | Squishy, gelatinous & slippery. | Firm, fibrous & pulls apart in shreds. |
| Touch / Palm Test. | Spongy, like the fleshy base of thumb. | Resilient and springy, like the palm center. |
| Cut Appearance. | Translucent pink center. | Solid opaque white or pale tan. |
| Shrinkage & Skin. | Skin loose and pale. | Skin taut, golden-brown & meat contracted. |
The Finger Firmness Touch Test
Chefs frequently assess meat doneness through tactile resistance. Furthermore, you can train your fingers to evaluate poultry firmness using your own hand as an anatomical reference:
- Relaxed Hand (Raw Chicken): Relax your hand completely. Furthermore, press the fleshy mound at the base of your thumb. The spongy, yielding softness matches the texture of raw, undercooked chicken.
- Middle Finger to Thumb (Medium): Touch the tip of your middle finger lightly to your thumb tip. Furthermore, press the muscle pad again. The moderate firmness reflects semi-cooked meat that still needs five minutes.
- Ring Finger to Thumb (Fully Cooked): Touch your ring finger firmly to your thumb tip. Furthermore, the muscle base becomes springy and firm without feeling hard as a rock. This springiness represents perfectly cooked, juicy poultry.
Always let your cooked chicken rest on a clean board for five minutes before carving. Furthermore, resting allows internal juices to redistribute throughout the muscle fibers, guaranteeing every bite remains tender and moist. For related kitchen food safety insights, read our guide on summer food safety and preventing food spoilage. Specifically, for more culinary guides, explore our full food and cooking recipes.